If you’ve finally decided to dive into VR with a brand new Meta Quest 3 or just looking to upgrade from the Quest 2, either way, you’re undoubtedly on the hunt for the ultimate unmatched experience. You guys actually broke the record for the most requested review since I started this channel. We were offered a Quest 3 for free, but I actually turned it down because I want this to be a real review that you can trust. About 2.5 million of you loved our Quest 2 review, and this one is exponentially better than that one. I’m going to take you through the unboxing and give you my honest and unbiased firsthand impressions, compare it with the Quest 2, PSVR2, and the all-new Apple Vision Pro. We’re also going to compare all of the most popular and important Quest 3 accessories so that you don’t regret picking the wrong ones and ensure that you have the best possible time with it.
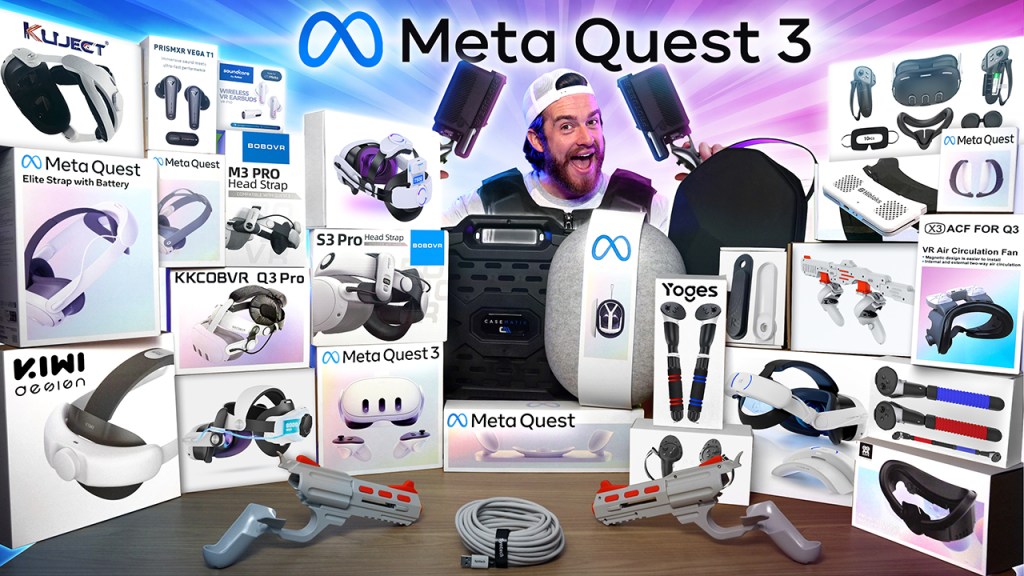
This is the new Ultimate VR bundle. We emptied our bank account to purchase nine of the top head strap attachments and compared them to make sure that you get the best, most comfortable, and long-lasting one. Haptic vests and gun recoil haptic attachments allow you to feel your games. For high-quality sound, we got the Soundcore VP10 earbuds and Prism XR Vega T1 earbuds, as well as cases, straps, and covers to protect you from avoidable tragedies. Always use protection because this will likely become your most loved device; you need to keep it safe and clean. You just got to wrap that Quest 3, and as a bonus, I’m going to give you some exclusive tips to enhance your VR experience. I’m also going to show you how to unlock the best possible graphics and open you up to the amazing world of PC VR with way, way more absolutely incredible games. We’ve spent thousands of hours reviewing and testing many gaming PCs over the past year, so we’re going to show you which VR-ready gaming PCs we recommend for every budget. I’ll have links down below for all the products that I mentioned.
First up, before all the optional accessories, let’s check out the actual headset, Meta Quest 3. I love unboxing things. We got the 128 GB version for $500, and for $650, you can get the version with 512 GB. We’ve got your two ring-free Touch Plus controllers. The quality of these actually feels closer to the Quest Pro controllers than they do to the Quest 2 controllers. This is it next to the previous Quest 2 controller. We now have this little handy button at the top that lets you easily pull off the battery cover. You actually had to just yank them off with the Quest 2. All four of the triggers feel and sound about the same on both the Quest 2 and the Quest 3. The Quest 3 triggers are a little bit more of a matted, rougher material versus the gloss finish from the Quest 2. I prefer the Quest 3’s just a little bit more. The joysticks feel about the same. The quality of the buttons is definitely a lot better on the Quest 3. There’s actually a little bit of a rattling effect that you hear on the Quest 2 when you just rub your fingers over it. But enough about the controllers, let’s check out the main event.
On the front right here, we’ve got your dual RGB color cameras, your depth projector on the bottom, your volume button, charging pins, an IPD adjustment, and then on the left side, your power button. Flipping it over to the inside, we’ve got some instructions for that IPD adjustment and how to pull it farther from your face for people with glasses. Let’s go ahead and take that out. We’ve got those same warnings like we got on the others: no liquid on lenses and no sunlight on lenses. This is where you can see how that IPD adjustment works. Basically, depending on the size of your head—I mean, mine’s pretty large for my big brain, so I might have to just scroll this all the way. We’ve also got these two buttons on the left and the right with four different levels for people with glasses.
Yeah, that’s the first thing I don’t like is how clumsy that whole process was. Right here on the straps are our speakers, which are apparently 40% louder than the Quest 2. Before I actually put this on, we’re going to see what else is in here. We’ve got this small box, and in here we’ve got your power cable, your charging brick, and a little instruction manual, welcome to Meta Quest 3. It’s basically a pretty handy quick-start guide. Alright, let’s go ahead and try her on. Pretty snug. You can see a little bit of light here by my nose. Not really a fan of that. Overall width and without a hat—I do not think these straps are that comfortable. It’s not a very even distribution of the weight, so hopefully one of those headsets that I got does a better job than this.
Next up: the Meta Quest 3 charging dock. We got a charge cable, the instruction booklet, and two rechargeable batteries—you just pop this off and put those in. We got a nice little flex where you actually put the headset, which is pretty cool. And then there’s nothing else in the box: no charging brick, which is kind of lame. A power adapter is not included; minimum 18 WT power adapter required; 45 W recommended. For how expensive this was, that’s kind of ridiculous. I tested with both an 18 and 45 WT charger, and you can see here that it did actually charge 20 minutes faster with a 45. Overall, it’s pretty nice and simplistic and easy to use, but for $130, you really should have included a power adapter.
Next up, the Yoges Game Handles, or Yoges—yoges, correct use posture, okay, Mom. Instructions on how to attach it—you fit this in here, wrap it around, but this one can click a little bit more to make it even tighter. Wow, that’s actually pretty intuitive. You can also attach these together. This is if you’re doing any kind of rowing motion or I guess a double-sided saber. I also got the AIXOTO VR handles, which had a slightly different setup. This one you just attach this top part to the bottom part, and then the little wrist wraps just kind of hang out, which I didn’t really like. Both of these similar attachments were weird and glitchy in Beat Saber and Gorilla Tag, even when you have that oriented perfectly facing the headset. Naturally, 5 to 10% of the moves that you do are going to lose tracking, and result in enough occasional flickering to be annoying. Neither one of these adds enough to be worth getting. Connecting the two sides and using Kayak VR on the PC was pretty amazing, though, as long as you had it oriented perfectly facing the cameras and held it far enough in front of you. It did add a nice little touch, but between the two of these, if you basically want to get it for just one game, then I’d go with the Yoges, as installation was easier and it was just overall more comfortable to use.
Next up, the Tyasoleil or Solle handle accessories for the Quest 3 user. Installation instructions for Meta Quest 2; for Meta Quest 3, already sounds pretty legit. Wow, that is a strong magnet fit—the clasp around the upper half of the controller and then place it into the controller case. These are for if you’re using the Quest 2. As cheap and simple as this solution is, after I manually calibrated it into my game, this thing was a game-changer when it came to accuracy with two-handed assault weapons. There’s a little bit of a learning curve when it came to finding the magnets when reloading, swapping guns, or throwing grenades, but you’ll get used to it. I also got the Tyasoleil handgun attachments. These were pretty easy to attach, and with my headset off, I can actually look at them—they seem pretty cool, but I really didn’t like how much wiggle room the controllers had.
During gameplay, when I can’t actually look at them, that extra wiggle room made them feel insecure—not that secure actually, so why don’t you look at me during the actual direction the guns are facing while you’re in game is way off from where they’re pointing right now, which really doesn’t matter too much. But honestly, in-game you kind of forget they’re even there, so in my opinion, these aren’t really worth it, so jumping into the head strap attachments, I actually got massive forehead headaches when using the strap that came with the Quest 3 and that top head strap was pretty uncomfortable too. So you’re definitely going to want to swap this out. Let’s just start off by showing you what not to get by showing you what sucked: Binboach VR USB power cable, excellent strap—the Binbo VR head strap with battery from Amazon was absolute trash. Yeah, it looks pretty cool, and the concept with double battery charging was great, but the actual battery connection was incredibly glitchy and about as reliable as a cat walking a straight line after a catnip party.
When the Quest 3 ran out of power before the battery did, I had to wait 10 to 15 minutes just to get back up into gaming for just a little bit of buffer power. Plus, this cheap little knob on the back of the head strap was already starting to give up on me and loosen on its own. This one’s so bad that I actually give it four poo emojis. The next headset that I do not like and do not recommend is the insanely overpriced Meta Quest Elite strap; with battery on top of this head strap being way more expensive than the others, it also had the most uncomfortable rigid, almost sticky silicone material on the back that actually kind of rips out your hair as you put it on. This top strap wasn’t any more comfortable either. The only thing that I liked about this one above all the others was that you could actually see the battery percentage within the Quest 3 dashboard, but it was also annoyingly the only headset that only charged up to 70% if you had the Quest 3 on while charging for safety reasons. We’ll talk about how all of these head straps compared when it comes to battery life and recharge time here in a sec.
It still just blows my mind that this head strap is more than double the price of most of these that I’m about to show you. Overall, I give this one deuce doodo. The first one on my list that actually deserves a good rating is the Kiwi Design Comfort head strap. This one doesn’t include an extended battery like the others, but it’s great for those of you casual gamers that are fine with the two hours that you get with just the Quest 3 battery or for those of you tethered to a computer for PC VR. This one gets a 3.9 out of 5 for comfort and that great price: just $15 after a $5 coupon— that’s pretty good. The only thing keeping it away from a better score is the fact that it doesn’t hold very well if you want to visor it out of the way for a quick minute. In sixth place on my list, the Kiwi Design Comfort Battery Head strap. That is quite the instruction manual; this one is just as comfortable as the one I just showed you but a little bit more quality in the way that it looks and feels. It also includes a 6400 mAmp battery, which gave us about 2.6 hours of extra battery life, but it did take 3.6 hours to recharge. This one didn’t visor up and hold very easily either—about one hour of battery more than that stupidly priced elite strap. I give this one four stars.
Number five on my list is the Bobo VR M3 Pro. This one is the successor to my favorite head strap on the Quest 2, but compared to some of the others that I’m about to show you, it’s just not as good. One hour and 40 minutes of extra play time was all this thing gave me, and this was the worst battery life out of all of these head straps. I did like that the battery was magnetic and you could get two of these with a recharge stand for easy swapping, but eventually you will run out of juice because it takes almost two and a half hours to recharge. Since I do all of these tests with a completely drained Quest 3, I discovered that this battery also doesn’t provide power quick enough. A couple of times, the Quest 3 actually powered off before this battery was even used up, and this was because it couldn’t replace the power to the Quest 3’s internal battery quickly enough, having to stop a game a couple of times for about 5 to 10 minutes for some buffer charging was just a little annoying. Not really something that you’d notice if the Quest 3 started at 100%, though for this one, 4.2 stars.
Oh my warning! It’s a choking hazard; swallowed magnets can cause serious infections and death. Yeah, if you can swallow something this big, you’ve got other issues. At number four, the Atop battery head strap. Because of there being so many points of contact, this one was even more comfortable, and with this coupon, only $50 for the version with a huge hug: 15,000 milliamp battery. The one we tested was about half that at 8,000 mamps, and this one gave us about 2 hours and 40 minutes of extra playtime and ours completely recharged in about 3.5 hours; this one actually was engineered in a way that allowed you to temporarily lift and hold your Quest 3 very securely. This one gets 4.4 stars.
Third place on my list is the Kawaye battery head strap. This one was pretty unique in that it had a click wheel adjustment on the top as well as on the back. This gave it that extra level of customizable comfort that I really liked. It even comes with two fastener options that allow it to connect to a Quest 2 or a Quest 3, and this one also comes with removable battery packs—not magnetic, which is kind of a bummer; it just kind of clicks in. But these batteries had the second longest battery life out of all these head straps: 3 hours extra of playtime on top of what you get with the Quest 3 and about 4.5 hours of recharge time. And my second favorite head strap overall is the KKCOBVR Q3 Pro. What sets this one apart from the others is this side knob design on both sides, which gives you the perfect amount of control when it comes to how close or far you want the headset to be from your face. This is especially useful for people with glasses. And with this one, we actually have the ability to visor the Quest 3 up and over your forehead. We tested 2.8 extra hours of battery life and only 3.3 hours of recharge time. This one is a solid 4.8 stars.
At number one, my absolute favorite of them all is the Bobo VR S3 Pro battery head strap. Not only is it slightly more comfortable than the rest, but it actually has a cooling fan built into it, which wasn’t that strong, and at 100%, it was actually kind of loud. But it did feel pretty cool when your face was dripping with sweat, and with your game volume at about 75% or higher, you won’t really notice the sound. You can adjust the fan speed with this little scroll wheel on the side, and the digital display above it will also show you your battery percentage. Not only did this battery last longer than all of the rest, but it was the only one with a recharge time that was actually quicker than the draining time. So if you purchased an additional battery with the recharge station, you get essentially to play your Quest 3 indefinitely, all day, every day, anywhere.
Now, if you just want the cooling, we tested the Q3 AC and Hiblocks cooling fan attachments. Both of them had about the same cooling as the Bobo VR head strap, but the Q3 AC was more comfortable with slightly stronger fans and less light coming into the nose area on this facial interface that it connected to. If you have an older Quest 2 head strap, another cheaper route is to get one of these 3D printed adapters by DeadEyeVR, which actually allows you to use your Quest 2 head strap with your Quest 3. If you only plan to be doing this once, I guess it’s kind of worth it, but it was honestly pretty crazy how tough it was to get my old Quest 2 Bobo VR head strap on it. I really felt like I was going to break it just to get it on. I just think it’s 3D printed way too large to protect our Quest 3.
We got the AIXOTO silicone protector cover set; this included controller grips, disposable face masks, lens covers, a silicone facial interface, and a front silicone cover. The controller grips were easy to install, allowed you to still access the batteries, and overall were very comfortable and secure. I definitely recommend these. The facial interface cover that went around the edges also felt way more comfortable and smooth against my face, and this little extra flap that came out around my nose blocked out that last bit of light that originally annoyed me. The disposable face masks were surprisingly not uncomfortable and are a pretty good solution to avoid sharing sweat when taking turns with friends. From personal experience, it might just make you look like a stud, too.
Oh yeah, this front cover, on the other hand, was easy to put on but also way too easy to slide off; don’t use one of these. You’re going to want a hard shell covering that actually stays on, protects better, and doesn’t slide around like that silicone one. We got this one from JHZWD on Amazon, and it clicks on very securely and also includes lens covers for the three front cameras.
Now, to keep all of this safe, as far as the most popular cases go, we’ve got the Anpro, the Casematix, and the main official one for Meta. The Anpro is by far the coolest but technically the least protective, despite the fact that it has 3D geometric patterns to resist earthquake. Your controllers just kind of go in this little bag right here, where they can bang around against each other, and the only hard part of this case is this polygon design top. The rest is padded but still pretty flexible and soft. I originally thought that with this more sleek and compact design, it would not fit a lot of those third-party head straps, but to my surprise, it actually comfortably fits all nine of those top head straps that I tested.
With my scientific testing of a very normal person without any mental health issues, that actually proved to be false. I’d say $30 is a pretty good deal for this one. Oh, it looks like you can pose like you’re in a boy band too. For $30 more than this one, the best protection that I’ve seen so far is the CASEMATIX custom travel case for Meta Quest 3. It’s the only one that’s extremely customizable by removing these foam blocks on the inside. And just like the Anpro, every single head strap that we tested can fit in this one too. The controllers can have their own customized spots too so that you can guarantee that they don’t bang into each other.
The only downside to it is how bulky it is compared to the rest. For $10 more than that at $70, you get the smallest case out of the three: the official Quest 3 case for Meta. It’s very protected as the top and bottom are both hard shells. I’m not really a fan of this very stainable rough gray fabric material on the outside. It’s got a designated spot for cables and your controllers to fit in very nicely, but if you plan to get the Atop or Kawai head straps, you’re out of luck as those simply won’t fit. Technically, the Bobo VR S3 Pro and the KKCOBVR did fit, but it was so tight that I’m pretty sure either the zipper or the head straps are going to break after only 10 or so uses, so a whopping four out of the nine head straps I would not use with this one. This is actually my least favorite one, especially considering that rip-off of a price, the one that I’ve been using with my Quest 2 for several years and my personal favorite is the Casematix because I prefer function over form.
Now finally getting into the really fun stuff: the bHaptics Tactsuit X16 and X40 vests. With 200 VR titles with built-in haptic feedback that work with the Meta Quest 3, the Meta Quest Pro, and Meta Quest 2, sink into your haptic powerhouse. Wow, as you can see, it’s custom-designed. My pack got a little snug. Alright, I kind of feel like a fat guy in a little coat. Fat guy in a little coat. Oh, we got some snaps to bring it down a little bit; that’ll help back massaging. Ooh, take me to dinner first. Let’s check out the haptic world real quick.
Shotgun! Whoa! Oh, that’s got some kick to it. Alright, I could actually see how this would be pretty useful when you’re trying to figure out very quickly where you’re getting shot from. Now for the big Bertha Tactsuit X40—oh, this one’s got a gold emblem! This one’s quite a bit heavier; only a six-pack on this one, so it must be designed for someone else. Ooh, this one feels a lot better; it actually feels like it’s made for big kids. Definitely feels stronger for sure, but it is more intense. But honestly, the only real benefit is the fact that it covers my entire midsection in first-person shooters.
The body recoil from the gun is specific to where your gun actually was on the body, and custom recoil types depending on what guns you’re using, explosion effects, and the ability to use another sense to immediately determine where you’re getting hit from—all of that gave me an extra level of immersion that I did not expect. The rumbling on epic roller coasters was also another game that I think added a nice little effect. I wouldn’t really get it for boxing games, though; the vibrations from that didn’t make it feel any more realistic. Honestly, you’re probably just going to take it off if you’re playing any active games; you already get pretty hot with those.
And to be even more honest with you, when you’re actually playing these games, you kind of forget which one of these you have on. They both felt very, very close to each other; it’s just the X16 is smaller with 16 motors versus 40 motors on the other one. If you do care a lot about looks and don’t want to look like a nerd like this guy, huh? Then by all means, spend $200 more on the X40. For your own reference, I’m 5’10”; you’re short.
When it came to upgrading your sound quality, there are two popular earbuds that people are purchasing with their Quest 3: the Prism XR Vega T1 and Soundcore VR P10. Both of their boxes include very similar attachments and charging cases. After a lot of testing in several different games and different types of music, I found the Prism XR to be a little louder, with better bass and better EQ presets within the app. It sounds a little bit more crisp and high quality overall. The Soundcore does look a little sleeker though and has cool RGB that corresponds to the device that you’re connected to.
If you want to get multiple dongles, then in the app, you can actually quickly switch between them. One con with the Soundcore though is that the tap controls were a little glitchy and didn’t always work. This is what the quality of the microphone on the Soundcore VP10 earbud sounds like, and this is what the quality of the microphone on the Prism XR earbuds sounds like. Pretty much the same as far as what everyone else will hear. If you do get the Soundcore, make sure you get the one from Best Buy that I have linked below, not the Amazon one.
The one from Amazon actually uses an old dongle that does not allow pass-through charging—a huge deal-breaker if you can’t charge a Quest 3 with these on. One thing that I love about both of these is that because they’re connected to the Quest 3 with a 2.4 GHz USB-C dongle, there’s very low latency, unlike the latency you usually get with Bluetooth connections. This allowed for game sounds to feel a lot more in sync with what I was actually seeing. Both of these earbuds also work with PC and gaming consoles, except for Xbox unfortunately, and they also both flawlessly switch to my phone when I get an incoming call, which I thought was pretty cool.
It even tones down my game sound so that I can hear the call and then brings them back up after the call is done. One thing that I can’t stand that they just removed from the Quest 2 and the Quest 3 is that you no longer can get phone notifications on your Quest. I have no idea why they’re removing features, but that’s just zucked.
Up next, something that I was really excited about. Protube VR—these are controller attachments that actually add haptic recoil feedback for gunshots. I got two Provolum 0.5 Force tube gun stocks for assault weapons. Putting everything together and getting it connected was pretty easy, but I was really, really shocked at how few games actually support this. Jumping into the forums, I came to find out that many other people actually had the same issues that I did. A few of the games that originally worked now no longer work. The gun stock was actually a bit annoying at first as it was pretty tough to find the magnets to connect the controllers to every single time I had to reload.
Eventually, I got used to it, but I really don’t think it’s worth a hefty price tag to get it with this haptic attachment. The one on the gun stock actually felt pretty weak, and it didn’t make me feel any more immersed. I absolutely loved these Provolers though; the haptic feedback for the pistols felt way more realistic, and it was so freaking cool dual-wielding them after installing a mod. Unfortunately, many of the games that Protube says work with these don’t actually work with the pistol haptics, just the assault weapons, and that’s a huge bummer.
So I honestly wouldn’t waste your money on the Provolers either, especially for only a couple of decent games, and my favorite one is only available if you’re connected to a PC. Once you connect your Quest 3 to a VR-ready gaming PC, you’re not going to want to go back as a PC gamer. The graphics on most Quest games really make me kind of sad; some of them almost make me feel like I’m playing a Nintendo 64 again. That all changes with a good gaming PC though. With a gaming PC, you unlock a whole new world of way more VR games, access to mods, way way better graphics, and the ability to customize game graphics options.
Cranking them all the way up is enough to bring tears to your eyes when you see how incredible everything looks. Kayak VR looks absolutely stunning and beautifully realistic. It’s actually kind of become my relaxing Zen space when I just need to get away. I mean, this game looked great before, but I’ve never seen it look this good. This is incredible; it’s hard to even tell that it’s fake. Half-Life: Alyx is another amazing PC VR game that I just can’t stop playing. This looks incredibly realistic; these graphics and textures are insane. I’ve never, never seen better graphics and textures in VR before, and Microsoft Flight Simulator was mind-blowingly realistic when I cranked all the graphic settings up. The fine details on those cities and environments were insane.
Oh, it’s storming; this is insane! We got a yacht for the actual PC VR link cable. I originally got this popular Syntech cable, but it charged very slowly if it actually charged at all. Then I got the Iniu Oculus link cable for Quest 3. I plugged my original Quest 3 charger into this, and it charged beautifully along with high-speed data from the PC. Get this one, not that one. As a tech YouTuber who specializes in reviewing gaming PCs, I’ve got some great insight on which VR-ready gaming PCs that you should get based on your budget, and I’m going to keep my recommended list of VR-ready gaming PCs updated for the next few years as well.
Pro tip: if the same game is available on the Quest and the PC, get it on the Quest, and you get access to the PC version for free too. If you’re coming from a console like an Xbox Series X or a PS5 and want your graphics to at least match that, then I would get this CyberPowerPC Gamer Master with a 4060 GPU. Anything less than this, and I’d say it’s not really worth the minimal graphics improvement you’d get. If you want to step it up a notch for something that looks better than an Xbox or a PlayStation, then I would get this Skytech Azure 2 with the 13th-gen i5 and 4070 TI that I reviewed. This PC is just as fast as the top-tier PCs less than two years ago but now less than $2,000 versus the $4,000 those PCs used to be.
To step it up even further to ultra graphics, I actually recommend the Alienware Aurora R16 as my tests showed it to have an insane price-to-performance ratio. This one is a little over $3,000, which is actually one of the least expensive gaming PCs with an i9 and 490 GPU. Proprietary Alienware PCs are a little harder to upgrade, so I would only get this one if you plan to be doing only minimal upgrades. My most recommended king of gaming PCs though is the Corsair Vengeance i7500. This one is very upgradeable; it’s got higher quality components and comes with a two-year warranty versus the one-year from nearly everybody else. It’s actually the third most purchased PC by my viewers.
The number one most purchased when comparing with other top-tier PCs with i9 CPUs and 4090 GPUs—if pretty much everything in this video is outside of your budget and you’re just watching this to live vicariously through my credit card debt, then I highly recommend you just get the older Quest 2, especially if you don’t really care about the higher resolution or colored mixed reality. The Quest 3 has about a 25% better resolution and a wider field of view, which does make you feel more immersed. But at $200, the Quest 2 is just a better bang for your buck. That’s less than half the price of the Quest 3. I still have no idea why the PSVR2 was $450—I liked that one, and I gave it a decent review, but without mixed reality and a lower resolution than the Quest 3 and no PC VR connectivity made it a huge pass.
Reports are showing the Quest 2 and Quest 3 to be outselling the PSVR2 by about 30 times. I tried out the Apple Vision Pro, and that one is just on another level. Its incredibly superior screen with resolution miles ahead of the others made it the most immersive VR experience that I’ve ever had. Sadly, the lack of games and support for PC VR made it pretty much pointless. $3,500 is ridiculous, even having the best resolution, nearly perfect mixed reality and eye tracking; it’s still pretty much pointless if there’s not that much fun you can have with it. You can have way, way more fun with a Quest 2 than an Apple Vision Pro. The Quest 2 and the Quest 3 can do most of what the Apple Vision Pro can do and more.
Giant screens and multiple monitor setups for your computer, 3D YouTube videos, and playing Xbox games on a giant virtual screen in my living room was pretty cool too. Okay, so I’m about to sum up everything that I actually do recommend you getting after all of my testing, but before I do that, please remember that purchasing all of this cost me several thousands of dollars of my own money, so please remember to help support this channel by using my links in the comments and description below, as I get a small commission at no cost to you, even if you purchase something different after using my link. Overall, if it doesn’t stretch you too much, I would get the Quest 3. If you don’t plan to be doing any PC VR, then I’d get the 512 GB version. I actually ran out of space pretty quick with my 128 GB version with just a few large games. Then get the Bobo VR S3 Pro strap, the CASEMATIX carrying case, the bHaptics X40 for adults, and X16 for kids under 12, the Prism XR earbuds, this very handy VR floor mat, which has been the perfect thing for keeping me in one spot and protecting my walls from getting holes in, and this hard shell front protective cover.
If you’re now interested in the Quest 2 instead, then make sure you check out my full review on that, or if you’d like to significantly enhance your VR experience with PC VR, then make sure you check out my full review comparing in detail all of the most popular gaming PCs. Also, make sure to like, comment, and subscribe with notifications turned on to stay up to date with all of my latest tech. Thanks for watching, guys. I love you guys. God bless.